Fabrication 1: Barcelona Pavilion by Mies van der Rohe
Techniques: Laser
cutting, patinating metals, veneer
Materials: Acrylic
(clear & opaque), recycled texture paper, brass sheets
Scale: 1:75
Scale: 1:75

Step 1 – Dimensioning in AutoCad/Rhino and 3D Modelling in SketchUp for reference

Separating out the different drawings according to the materials and their thickness - walls, roof and doors/windows. These are the roof elements in 3mm thick clear acrylic.

The floor plates are cut in 3mm thick opaque white acrylic, and engraved with 1300x1300mm squares as representation of the white stone tiles. Outlines of the walls are also engraved to help with alignment during the assembly process later.

Internal and external walls are cut to size with 2mm thick opaque white acrylic, with external walls engraved to represent the stone tiles as well.

Opening the AutoCAD files in the laser cutting templates on Rhino in preparation to be cut.
Step 2 – Assembly & Surface Veneer
In order to best replicate the look and texture of the stone walls used in the Barcelona Pavilion, I had the idea of rusting a metal sheet to a green patinate. Following are pictures documenting this process.

Mixture of household white vinegar and salt was used as a concoction prepared in a tray to hold the solution.


The brass sheet is first sanded down in a circular manner to induce crevices for the patinate to form.


After about 2 days of sitting to dry and exposed to the air.


Assembling the pieces together, starting with the white marble floor and wall surfaces, and glass doors.


Cutting the patinated brass sheets to size of the walls and gluing them together, as well as the wood grain and recycled paper veneer to replicate the internal light brown stone textures, and eventually completing the model with the clear acrylic roof panels.
Step 3 – Lessons Learnt & Future Improvements
Time & Budget: Overall, the total time spent was about half of what I had foreseen to spend at about 3.5 days, and the total money spent was $125, which is less than expected. Most of the money spent was on the acrylic boards and laser cutting session.
Cost Breakdown:
3x Acrylic Panels - $25+$25+$20 = $65
Laser Cut Session - $30
Brass Sheet & Veneers - $30
I enjoyed experimenting with metal patina to achieve the desired effect, however one thing I would have done differently was to cut the metal sheets to the wanted sizes before the patina process. The patina actually created textures which were protruding from the surface, making it difficult to cut accurately. Also, the engraving of the tiles on the white acrylic was not as deep and visible as I had wanted it to be before, and had to experiment with the deeper engraving settings on the laser cutter.
🔺🔻🔺🔻🔺🔻🔺🔻🔺🔻🔺🔻🔺🔻🔺🔻🔺🔻🔺🔻🔺🔻🔺🔻🔺🔻🔺🔻🔺
Fabrication 2: Cologne Chair by Lukas Reimbold
Techniques: Timber woodworking, domino joining, cutting
Materials: Pine Kauri wood
Scale: 1:2
Step 1 – Dimension & 3D Modelling in SketchUp

The first step to planning to build the cologne chair was to create it in sketchup so I can visualise and plan for the dimensions needed to purchase at a wood workshop.
Step 2 – Assembly

Coming from the wood supplier Anagote PTY LTD in Marrickville who happened to have the exact timber thickness dimensions I needed of 30x30mm, the planks were brought back to squarehouse workshop to be cut to smaller desired dimensions with the help of workshop staff with the drop saw.


Having not had the Domino Joining training before, I learnt the advanced woodworking and domino biscuit joiner badges on the spot with the help of workshop staff. Labeling the joints helped to distinguish clearer which end connected to which end.

The next step was to fill the domino joints with wood glue and connecting the joints together.

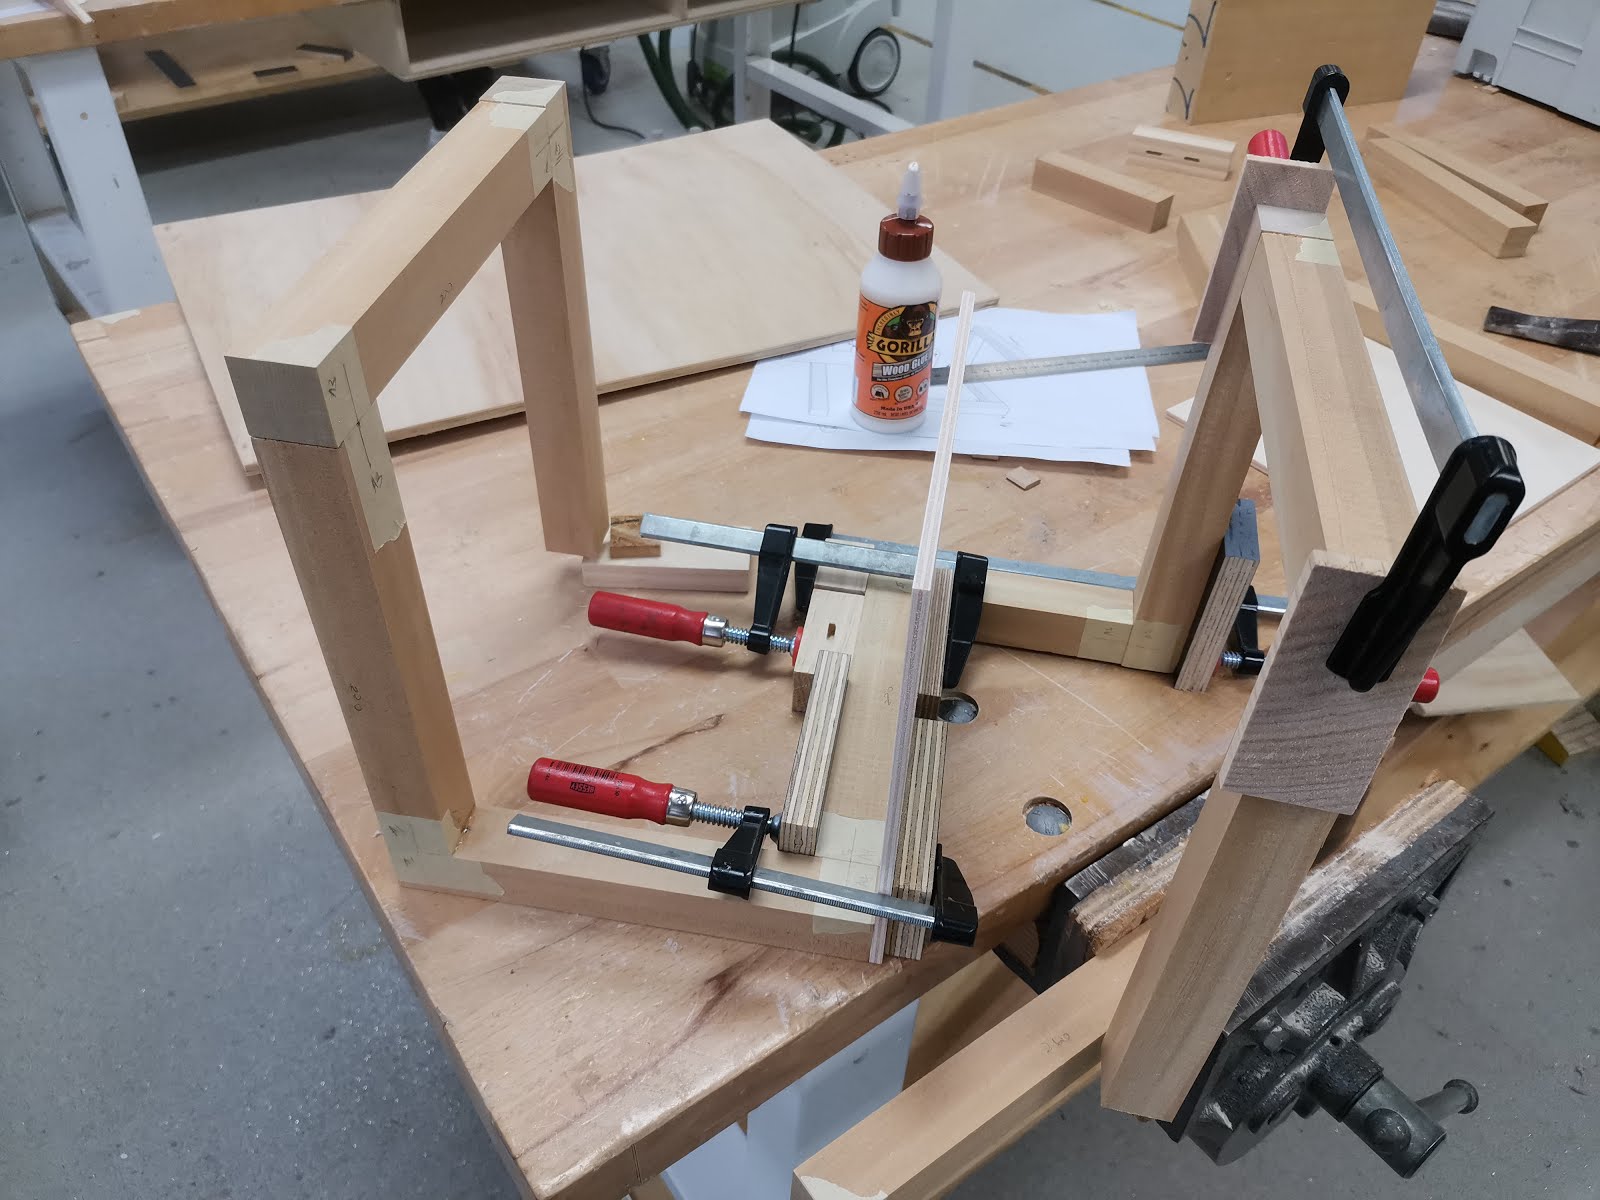
Clamping them at the different joints at intervals of 3hours for it to settle and dry.

Step 3 – Lessons Learnt & Future Improvements
Time & Budget: Overall, the total time spent was 2 days, mainly held back by letting the glue and joints settle before working on it again. The total money spent was $32, which is less than expected. Most of the money spent was on the pine planks.
Cost Breakdown:
Pine Kauri Cuts - $20
Timber plank - $12

Having not had knowledge about the domino and biscuit machinery, I purchased a pack of timber dowels for joining - which would have not been as efficient as the domino joining method available in the workshop.
🔺🔻🔺🔻🔺🔻🔺🔻🔺🔻🔺🔻🔺🔻🔺🔻🔺🔻🔺🔻🔺🔻🔺🔻🔺🔻🔺🔻🔺
Fabrication 3: Agora Tower by Vincent Callebaut
Techniques: 3D Modelling, 3D printing
Materials: 3D print filament
Scale: 1:500
Scale: 1:500
Step 1 – AutoCad Plans, Sketchup & Rhino


Extracting the floor plate outline from available floor plans on the web, I could extrude the plan in sketchup to build the model.


Rotating the floor plate mass in sketchup every level it gets higher by 4.5 degrees for 20 storeys around its service core.

The sketchup file is then opened in Rhino and saved as an .stl file to be used with the 3D printing software.
Step 2 – 3D Print


The first attempt 3D printing was unsuccessful as the 3D printer had run out of filament before it was complete. The 2nd attempt was successful.

Step 3 – Lessons Learnt & Future Improvements
Time & Budget: Overall, the total time spent was 3 days, and the total money spent was $69, which is a bit more than expected. It took about 23 hours to print the model, which was longer than I had anticipated.
Cost Breakdown:
3D Print - $3 x 23 (hours) = $69
Creating the physical model from Autocad plans to 3D model and seeing the 3D print fail is not an uncommon experience for me, and forecasting for failures in 3D print should always be taken into consideration when meeting deadlines.
🔺🔻🔺🔻🔺🔻🔺🔻🔺🔻🔺🔻🔺🔻🔺🔻🔺🔻🔺🔻🔺🔻🔺🔻🔺🔻🔺🔻🔺
Comments
Post a Comment